42 how to create labels with mail merge
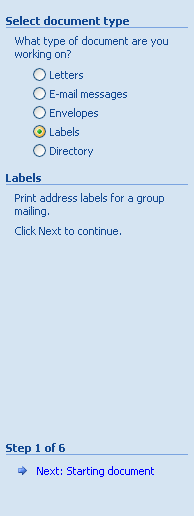
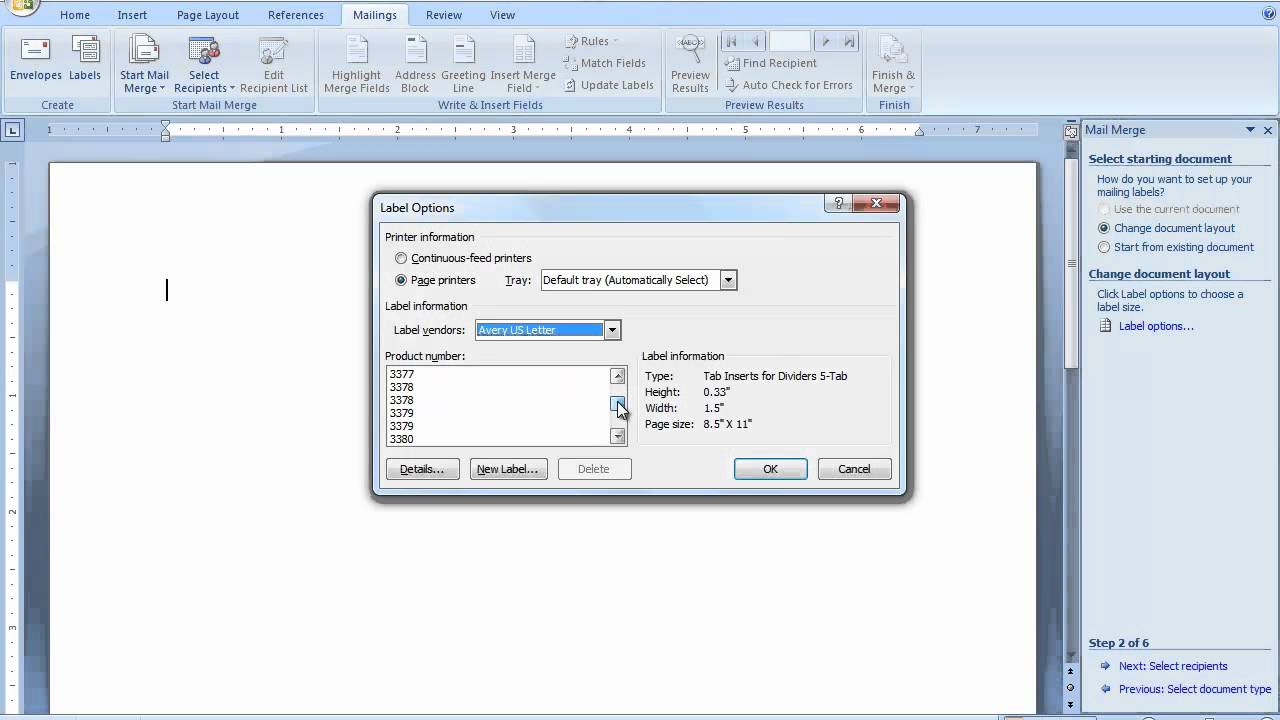
Foxy Labels – Avery Label Maker that Works in Google Docs Design customized labels with dozens of fonts and colors, create mail merge lists, and print labels, right from Google Docs. Say goodbye to Microsoft Word. Switch to a more simple solution. Install Foxy Labels. Design Customized Labels. Adjust … PDF How to Use Mail Merge to Create Mailing Labels in Word On the Mailings tab, click Start Mail Merge, and then click Step by Step Mail Merge Wizard. This will open a set of directions on the right side of the screen that we will be following. 1. Under Select document type, click Labels, and then click Next: Starting Document. (way at the bottom right of the screen) 2.
Create and print labels from Google Docs & Sheets - Labelmaker Labelmaker is the best way to mail merge labels within Google Suite. Create and print labels from a wide choice of label templates including Avery labels for Google Docs or Google Sheets. Install Labelmaker. Rated 4.9/5 from 4 million users. The quickest way to mail merge labels ...

How to create labels with mail merge
Creating a Mail Merge to Labels in Microsoft Outlook If you want to do do a mail merge to create mailing labels, follow the steps in Use Outlook's Contacts with Mail Merge to begin your mail merge. When the Mail merge dialog opens, select Labels from the Document Type menu. Click the Ok button and the merge document is created. How to Create a Label-Based Mail Merge Template in Microsoft Word Follow these steps to create a Microsoft Word labels template for use in Wealthbox Mail Merge: Open a blank document in Microsoft Word Select the "Mailings" Tab Once on the tab, please select "Start Mail Merge > Labels". Then select the size appropriate for your labels and click "OK" Click on the "Select Recipients > Type New List" 5. How to Create Mail Merge Labels in Word 2003-2019 & Office 365 If you're making another type of document, use the "Insert Merge Fields" button in the "Mailings" tab. Be sure to add spaces, commas, etc if you're creating your own layout. Hit the "Update all labels" button and then "Next: Preview your labels." Check that your data copied over correctly and you're happy with the final result.
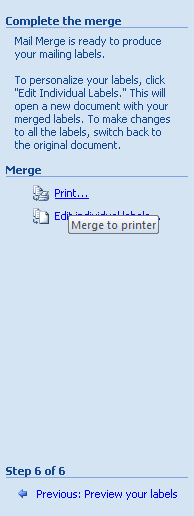
How to create labels with mail merge. How to create an E-mail Merge using Microsoft Outlook 1. Open up Word 2010. Create a new e-mail message in Word. Now you are ready to begin the merge by selecting the “Mailings” tab in the ribbon. 2. In the “Start Mail Merge” grouping, click on the “Start Mail Merge” button. It will show a list of mail merge options available. You can choose Letters, E-Mail Messages, Envelopes, Labels or Help with mail merge to Avery Labels in Word | Avery.com If everything looks correct then you can click on Next: Complete the Merge. Click Edit Individual Labels to open the Merge to New Document window. Be sure All is selected and click OK. This should create the fully merged document. Mail Merging without using the Step by Step Wizard. You can also click on the Mailings tab at the top of the screen. What is the purpose of the mail merge? | AnswersDrive Mail merge is a process to create personalized letters and pre-addressed envelopes or mailing labels for mass mailings from a form letter. When the mail merge process is run, the word processing system creates an output document for each row in the database, using the fixed text exactly as it appears. Creating Address Labels Using Mail Merge in Office 365 Creating Address Labels efficiently using Mail Merge 1. Launch Mail Merge from Word 2. Start a Document 3. Select your Recipients 4. Arrange your Labels 5. Preview your Labels 6. Complete the Merge Final Thoughts Frequently Asked Questions Now, if you're working on a tight budget or want to lower costs, a DIY approach may be ideal.
Video: Use mail merge to create multiple labels But there is a much better way, and it's called Mail Merge. I'll show you it works. Click the MAILINGS tab, and click Start Mail Merge, and Labels. You start by selecting your label options. We'll just use the same labels from the first movie, and … How to Make Address Address Labels with Mail Merge using ... - YouTube With the holidays fast approaching, now is a good time to tackle your address list. By using an Excel spreadsheet and the Mail Merge tool in Word, you can ea... Creating labels in mail merge - Microsoft Community In the meantime, you may refer to the following support articles for steps on how to create and print labels using mail merge. Make sure to check out the Prepare the worksheet data in Excel for the mail merge section. Create and print mailing labels for an address list in Excel Create and print labels using mail merge Looking forward to your reply. Video: Use mail merge to create multiple labels Use mail merge Create and print labels Video Use mail merge Video Format and add a graphic Video More options and custom labels Video Next: Creating an MLA paper with citations and a bibliography Overview Transcript If you wanted to create and print a bunch of recipient address labels, you could type them all manually in an empty label document.
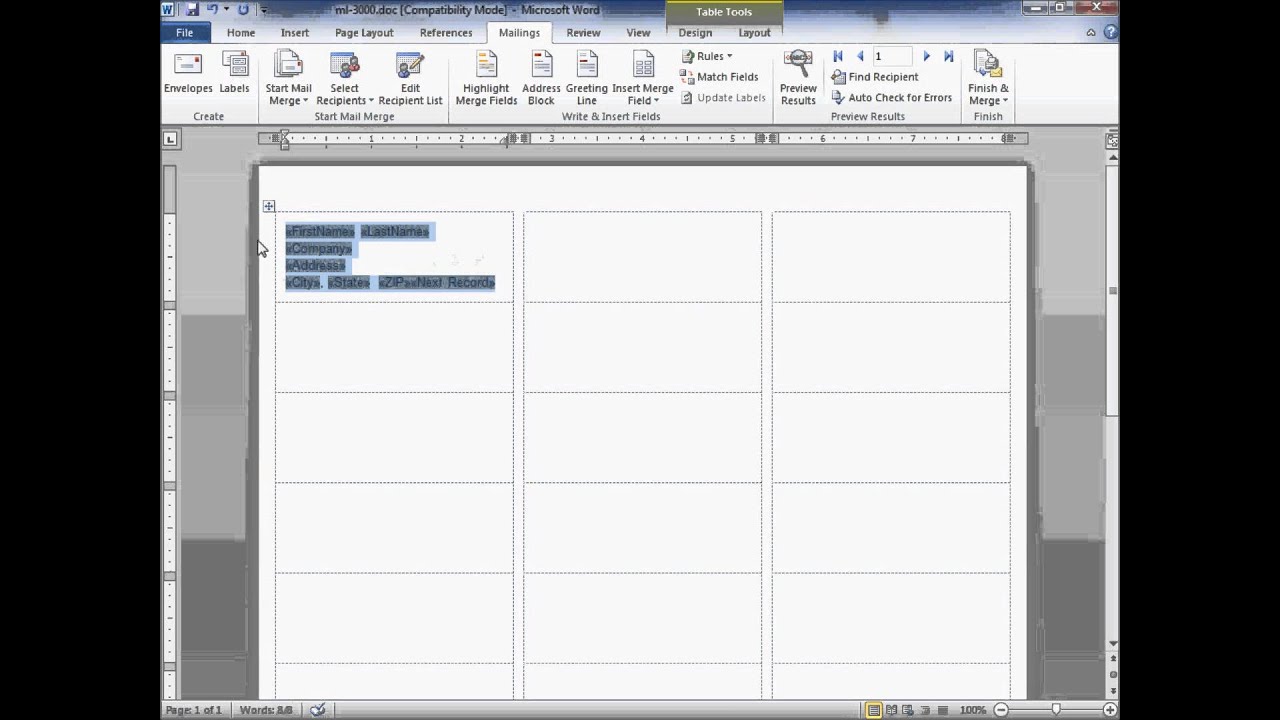
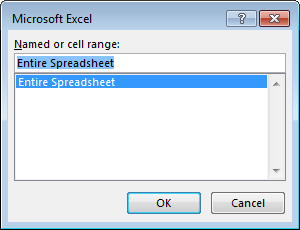
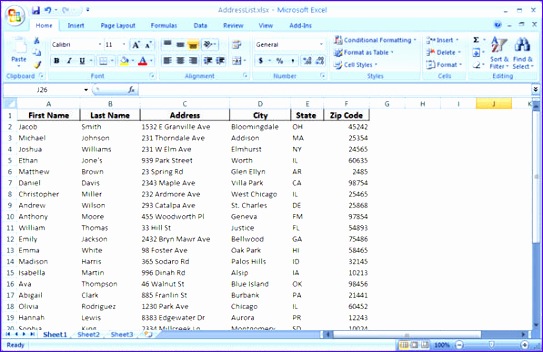
How to Use Mail Merge to Create Mailing Labels in Word Oct 24, 2016 · Click Next: Complete the merge Perform the merge In the Mail Merge task pane, verify that the Complete the merge step is displayed. 6. To merge on the screen, click Edit individual labels. The Merge to new document dialog box appears, so that you can select which records to merge. Select All and Click OK to merge the labels. Mail merge using an Excel spreadsheet - support.microsoft.com Choose Edit Recipient List. In Mail Merge Recipients, clear the check box next to the name of any person who you don't want to receive your mailing. Note: You also can sort or filter the list to make it easier to find names and addresses. For more info, see Sort the data for a mail merge or Filter the data for a mail merge. Insert a merge field Create and print mailing labels for an address list in Excel To create and print the mailing labels, you must first prepare the worksheet data in Excel, and then use Word to configure, organize, review, and print the mailing labels. Here are some tips to prepare your data for a mail merge. Make sure: Column names in your spreadsheet match the field names you want to insert in your labels. Use mail merge for bulk email, letters, labels, and envelopes Create and print sheets of mailing labels Directory that lists a batch of information for each item in your data source. Use it to print out your contact list, or to list groups of information, like all of the students in each class. This type of document is also called a catalog merge. Create a directory of names, addresses, and other information
Create Labels Using Mail Merge : Label Envelopes « Mail Merge « Microsoft Office Word 2007 Tutorial
How To Print Address Labels Using Mail Merge In Word Open Word and create a blank document. Click on the MAILINGS tab at the top of the page. Click on START MAIL MERGE and select STEP BY STEP MAIL MERGE WIZARD. This opens the Mail Merge Wizard panel on the right hand side of your screen. This panel will guide you through the SIX STEPS of the mail merge.
How to Create Mail Merge Labels in Word 2007 - OnlineLabels.com
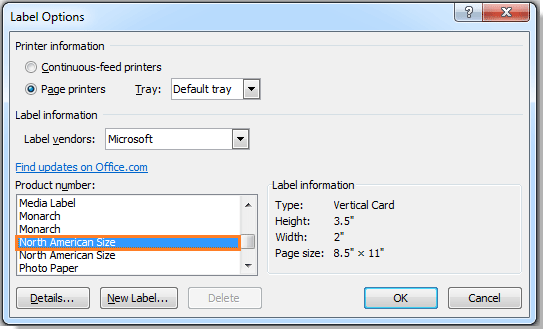
How to mail merge and print labels in Microsoft Word Step one and two In Microsoft Word, on the Office Ribbon, click Mailings, Start Mail Merge, and then labels. In the Label Options window, select the type of paper you want to use. If you plan on printing one page of labels at a time, keep the tray on Manual Feed; otherwise, select Default.

Step by Step Guide on Using Mail Merge Wizard in Word 2007 | HubPages
How to Merge an Excel Spreadsheet Into Word Labels Mar 24, 2019 · To do this, create a n_ew Word document and return to the Mailings tab. Select the option you would like to create, from the Start Mail Merge box, and repeat the steps above to merge your contact ...
Create Labels Using Mail Merge : Label Envelopes « Mail Merge « Microsoft Office Word 2007 Tutorial
Create Custom Labels with Mail Merge: Microsoft Word - YouTube In this video, I will teach you how to create custom labels in Microsoft Word using the Mail Merge feature. Mail Merge is one of the rarely understood featur...

3 Ways to Do a Mail Merge - wikiHow
Mail Merge || Seat Label || Create Seat Label by Mail Merge ||How to ... Mail Merge |Mailing |Seat Label |Create Seat Label by Mail Merge |How to make seat labels by Mail Merge #MailMerge, #Mailing #SeatLabel, ...
Address Label Mail Merge Tutorial - YouTube
How to mail merge and print labels in Microsoft Word May 04, 2019 · For help creating a CSV file, see: How to create a CSV file. Once a CSV file is prepared, the steps below can be followed to create labels using a mail merge. Step one and two. In Microsoft Word, on the Office Ribbon, click Mailings, Start Mail Merge, and then labels. In the Label Options window, select the type of paper you want to use. If you ...

How to Print Labels in Word, Pages, and Google Docs
How to Mail Merge Address Labels Using Excel and Word 3. Open Word and go to "Tools/Letters" and "Mailings/Mail Merge". If the Task Pane is not open on the right side of the screen, go to View/Task Pane and click on it. The Task Pane should appear. 4. Fill the Labels radio button In the Task Pane. 5. Click on Label Options and choose the label you are using from the list.
![What's mail merge? How to do a mail merge with PDF layout? [A-PDF.com]](http://a-pdf.com/faq/i/a-pdf label create.gif)
What's mail merge? How to do a mail merge with PDF layout? [A-PDF.com]
Print labels or envelopes using mail merge with an Excel … Print labels. Creating labels with mail merge is a four-step process: set up a document to match your labels, connect to your spreadsheet, format the merge fields, and then print your labels. Step 1: Set up a document to match your labels. On the Mailings tab, click Start Mail Merge > …

How to Mail Merge in Microsoft Word: 12 Steps (with Pictures)
Create and print labels using mail merge - Sibanye-Stillwater Step 2: Prepare the main document for the labels In Word, choose File > New > Blank Document. On the Mailings tab, in the Start Mail Merge group, choose Start Mail Merge > Labels. In the Label Options dialog box, under Label Information, choose your label supplier in the Label vendors list.

10 Microsoft Word Return Address Label Template - SampleTemplatess - SampleTemplatess
Video: Create labels with a mail merge in Word Once your mailing addresses are set up in an Excel spreadsheet (see the previous video to learn how), it's a snap to get Word to create mailing labels from them. Create your address labels In Word, click Mailings > Start Mail Merge > Step-by-Step Mail Merge Wizard to start the mail merge wizard.

Learn how to create Address Labels | Mail merge, Mailing labels, Words
How to Create Mailing Labels in Word from an Excel List Step Two: Set Up Labels in Word Open up a blank Word document. Next, head over to the "Mailings" tab and select "Start Mail Merge." In the drop-down menu that appears, select "Labels." The "Label Options" window will appear. Here, you can select your label brand and product number. Once finished, click "OK."
How to create mailing labels by using mail merge in Word?
How To Create Mailing Labels - Mail Merge Using Excel and Word from ... In this video I show you how you can print mailing labels using the mail merge function in Microsoft Office 365 Word and Excel. This isn't hard, but if you d...
Technology / Mail Merge Labels
How to Make and Print Labels from Excel with Mail Merge Open the "Mailings" tab of the Word ribbon and select "Start Mail Merge > Labels…". The mail merge feature will allow you to easily create labels and import data to them from a spreadsheet...
10 Excel Mail Merge Template - Excel Templates
How to Create and Print Labels in Word Using Mail Merge and Excel ... To start the merge and specify the main document for labels: Create a new blank Word document. Click the Mailings tab in the Ribbon and then click Start Mail Merge in the Start Mail Merge group. From the drop-down menu, select Labels. A dialog box appears. Select the product type and then the label code (which is printed on the label packaging).
Create Labels Using Mail Merge in Word 2007 or Word 2010 - YouTube
Creating a Mail Merge for Labels with Word and Excel and adding an ... This video will show you how to quickly create Mailing Labels using Word and Excel. Additionally if you wanted to add a logo you'll need to right-click on t...

6 Mail Merge Excel Template - Excel Templates - Excel Templates
Video: Create labels with a mail merge in Word Create your address labels. In Word, click Mailings > Start Mail Merge > Step-by-Step Mail Merge Wizard to start the mail merge wizard. Choose Labels, and then click Next: Starting document. Choose Label options, select your label vendor …

Mail Merge: Creating Form Letters and Labels
Create and print labels from Google Docs & Sheets - Labelmaker Create & print labels in Google Docs. Labelmaker is the best way to mail merge labels within Google Suite. Create and print labels from a wide choice of label templates including Avery labels for Google Docs or Google Sheets. Install Labelmaker. Labelmaker 5 stars ratings.
Post a Comment for "42 how to create labels with mail merge"